How To Create a Branch In GitLab-Create a New Branch
How To Create a Branch In GitLab-Create a New Branch
after login to your gitlab account or gitlab server enter into to your project. once you are in your project we can create new branches. to create new branches in gitlab we can follow 2 methods. using both two methods we can create a new branch in gitlab
1st method
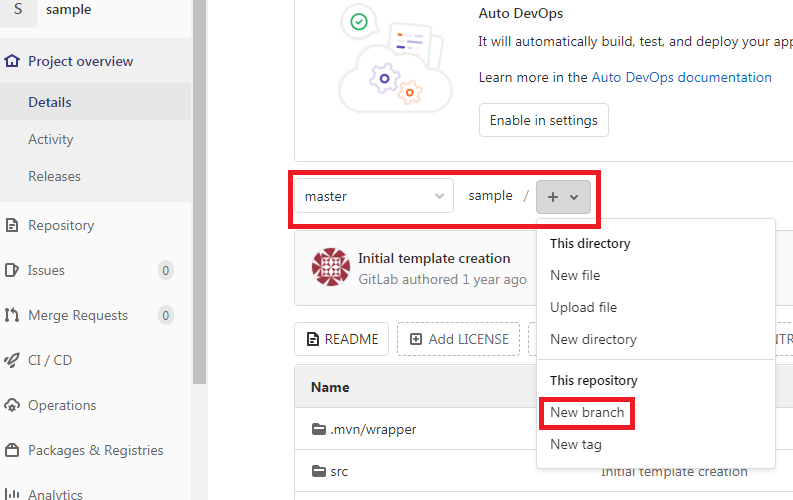
once you are in your project you can see by default master branch, right to this master branch there will be a your project name and one plus(+)symbol will be there click on that plus(+) symbol. you can see new branch option click on that it will redirect you to create new branch page. here sample is my project name.
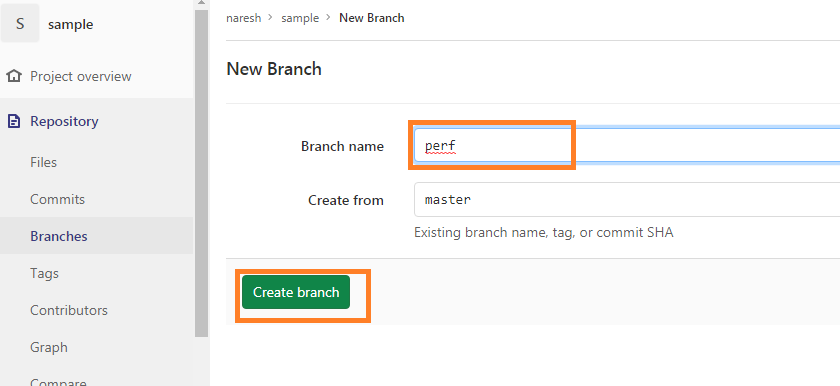
here enter you branch name, and click on create branch. that’s it new branch will be created, here i created branch name called perf.
2nd method
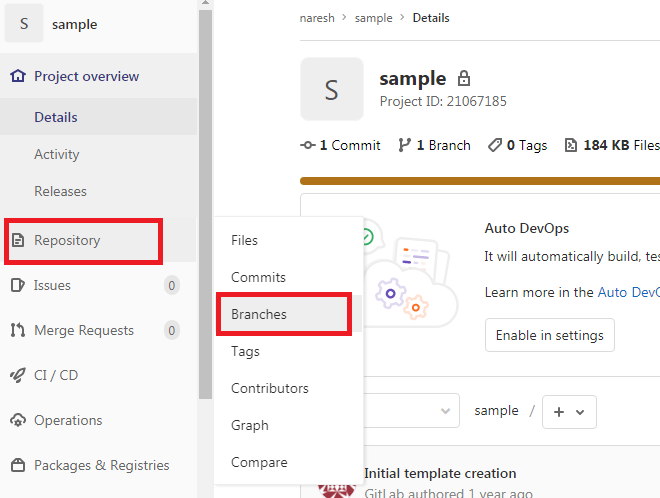
after enter into your repository you can see left side menu, in the left side menu you can see repository option. hover your mouse on repository, you can see branches option.
click on that branches it will redirect you to branches page here you can see the new branch option in the right side.
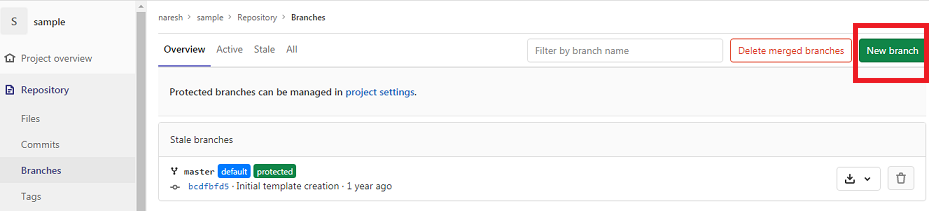
click on that, it will also redirect you to same new branch creation page as said in above.
enter your branch name and click on create branch, new branch will be created in your gitlab repository.